Building complex forms with Laravel Livewire in Oh Dear original
Together with my buddy Mattias Geniar, I run Oh Dear, an uptime checker service on steroids.
Unlike most uptime trackers, Oh Dear doesn't only check your homepage, but every single page of your site. When we detect a broken link or some mixed content, we send a notification. Oh, and we provide status pages, like this one from Laravel and Flare too.
In this blog post, I'd like to show you how we use Livewire to render some complex forms in the UI of Oh Dear.
What is Livewire?
Livewire is an impressive library written by Caleb Porzio that aims to make building dynamic interfaces simple, without needing to resort to JavaScript for most cases).
This blog post isn't an introduction to Livewire, if you need that head over to this video series on the Livewire docs. Before continuing reading my post, you should have a grasp of what Livewire can do.
Oh Dear was initially built a couple of years ago (oh how time flies), and our best option for creating the UI we wanted was, at the time, Vue. Both Mattias and I don't see ourselves as JavaScript experts. If we can solve something on the server-side, that will probably be our preferred route. That's why we're now slowly replacing our custom Vue components with Livewire.
I still love Vue, but in some instances, we don't want the complexity that it brings. In this blog post, I'll show you two examples of Vue components that were replaced by Livewire counterparts.
A Livewire component to add headers
Oh Dear sends requests to sites to check their health. Users can specify extra headers that should be used when making those requests.
This is how the form in the site settings screen looks like.
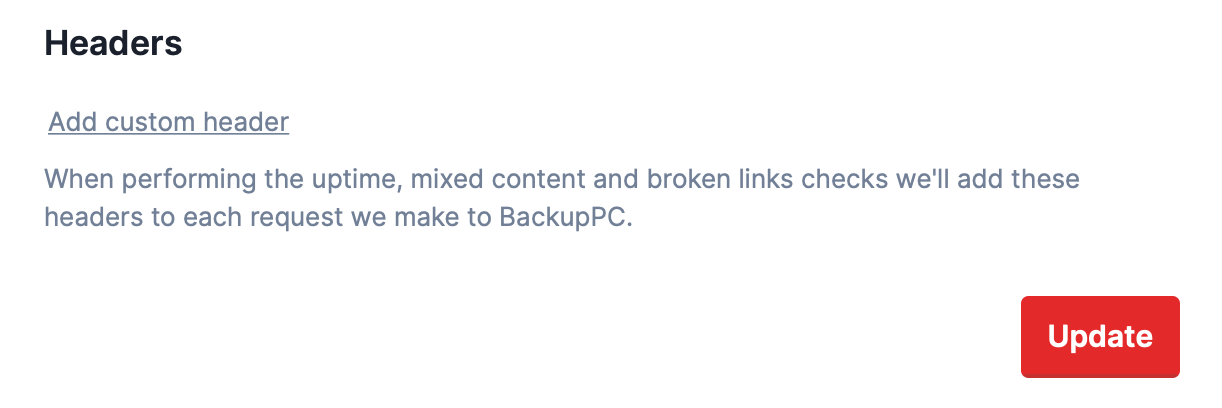
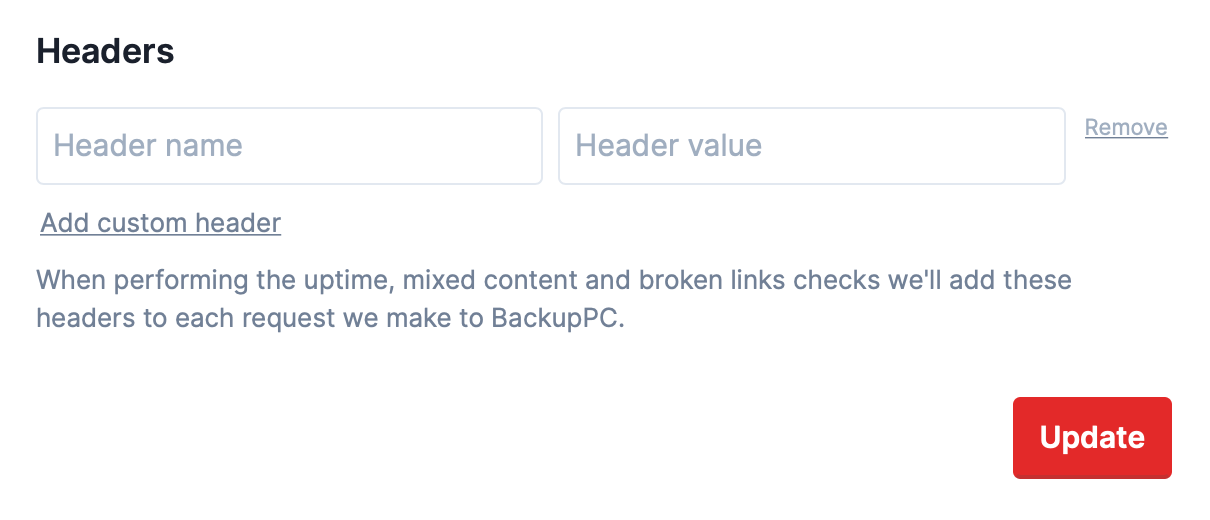
When clicking "Add custom header" fields are displayed to enter the name and value of the header.
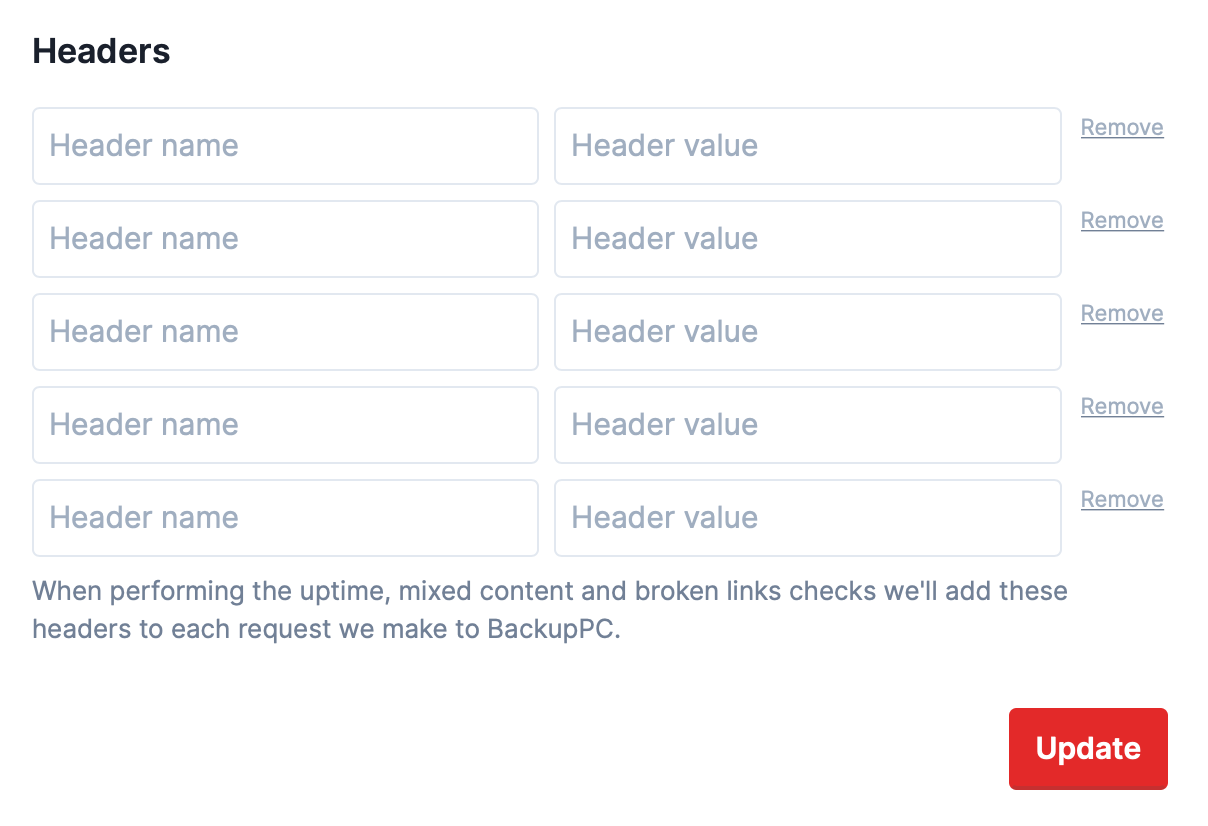
Users can specify up to five headers. If there are five headers on screen, the "Add custom header" button will be hidden.
Of course, when you press "Remove", that line will get removed. Any changes you make will get saved when clicking "Update".
Let's take a look at the needed HTML when rendering two headers.
<form method="POST" class="form mb-8">
    <input type="hidden" name="_token" value="...">
    <div class="form-group is-row">
        <div class="flex-1">
            <div>
                <div>
                    <div class="flex mb-2">
                        <div class="flex flex-col flex-grow">
                            <div class="mr-2 flex-grow">
                                <input value="" placeholder="Header name" type="text"
                                       name="http_client_headers[0][name]">
                            </div>
                        </div>

                        <div class="flex flex-col flex-grow">
                            <div class="mr-2 flex-grow">
                                <input value="" placeholder="Header value" type="text"
                                       name="http_client_headers[0][value]">
                            </div>
                        </div>

                        <div class="button is-secondary items-center">
                            <div class="text-xs text-gray-500">
                                Remove
                            </div>
                        </div>
                    </div>
                    <div class="flex mb-2">
                        <div class="flex flex-col flex-grow">
                            <div class="mr-2 flex-grow">
                                <input value="" placeholder="Header name" type="text"
                                       name="http_client_headers[1][name]">
                            </div>
                        </div>

                        <div class="flex flex-col flex-grow">
                            <div class="mr-2 flex-grow">
                                <input value="" placeholder="Header value" type="text"
                                       name="http_client_headers[1][value]">
                            </div>
                        </div>

                        <div class="button is-secondary items-center">
                            <div class="text-xs text-gray-500">
                                Remove
                            </div>
                        </div>
                    </div>
                </div>

                <div class="button is-secondary mr-4">
                    Add custom header
                </div>
            </div>
        </div>
        <div class="help">
            When performing the uptime, mixed content and broken links checks we'll add these headers to each request we
            make to BackupPC.
        </div>
    </div>
    <div class="form-group has-button">
        <button type="submit">Update</button>
    </div>
</form>
The cool thing to note here is that you can use [] when you want to submit an array of data. This is standard HTML. Here are all the names of the form elements in the snippet above:
-
http_client_headers[0][value] -
http_client_headers[0][name] -
http_client_headers[1][value] -
http_client_headers[1][name]
On the server-side, this is how that data gets validated.
namespace App\Http\App\Requests;

use App\Domain\Site\Rules\HttpHeaderNameRule;
use Illuminate\Foundation\Http\FormRequest;

class UpdateHeaderSettingsRequest extends FormRequest
{
    public function rules(): array
    {
        return [
            'http_client_headers' => 'array|max:5',
            'http_client_headers.*.name' => ['required','max:500', new HttpHeaderNameRule()],
            'http_client_headers.*.value' => 'required|max:500',
        ];
    }
}
I'll sidestep a little and, for completeness, show the code of that HttpHeaderRule:
namespace App\Domain\Site\Rules;

use Illuminate\Contracts\Validation\Rule;

class HttpHeaderNameRule implements Rule
{
    public function passes($attribute, $value)
    {
        $value = strtolower($value);

        return ! in_array($value, [
            'accept-encoding',
            'connection',
            'user-agent',
            'host',
            'referer',
            'pragma',
        ]);
    }

    public function message()
    {
        return 'This header is not allowed.';
    }
}
Now that you know which HTML is rendered and how it is validated, let's take a look at our Vue components that would handle rendering the HTML.
Here's the content of HttpHeaders.vue.
<template>
    <div>
        <div v-for="(httpHeader, index) in httpHeaders">
            <http-header
                :http-header="httpHeader"
                :index="index"
                :error="getError(index)"
                :removable="removable"
                @remove="removeHeader(httpHeader)"
            ></http-header>
        </div>

        <div v-if="httpHeaders.length < 10" @click="addHeader" class="button is-secondary mr-4">
            Add custom header
        </div>
    </div>
</template>

<script>
import httpHeader from './httpHeader';

export default {
    props: ['initHttpHeaders', 'initErrors'],

    components: {
        httpHeader,
    },

    computed: {
        removable() {
            return true;
        },
    },

    data() {
        return {
            httpHeaders: [],
            errors: {},
        };
    },

    created() {
        this.initHttpHeaders = this.inithttpHeaders;
        this.errors = this.initErrors;
    },

    methods: {
        addHeader() {
            this.httpHeaders.push(this.emptyHeader());
        },

        removeHeader(httpHeader) {
            this.httpHeaders.splice(this.httpHeaders.indexOf(httpHeader), 1);

            this.errors = {};
        },

        emptyHeader() {
            return { name: '', value: '' };
        },

        getError(index) {
            return {
                name: this.errors[`http_headers.${index}.name`],
                value: this.errors[`http_headers.${index}.value`],
            };
        },
    },
};
</script>
And here is the content of HttpHeader.vue.
<template>
    <div class="flex mb-2">
        <div class="mr-2 flex-grow">
            <input
                placeholder="Header name"
                type="text"
                v-model="httpHeader.name"
                :name="`http_headers[${index}][name]`"
            />

            <div class="form-error" v-if="hasError('name')">
                {{ getError('name') }}
            </div>
        </div>

        <div class="mr-2 flex-grow">
            <input
                placeholder="Header value"
                type="text"
                v-model="httpHeader.value"
                :name="`http_headers[${index}][value]`"
            />

            <div class="form-error" v-if="hasError('value')">
                {{ getError('value') }}
            </div>
        </div>

        <div class="button is-secondary items-center">
            <div v-if="removable" class="text-xs text-gray-500" @click="$emit('remove')">
                Remove
            </div>
        </div>
    </div>
</template>

<script>
export default {
    props: ['httpHeader', 'removable', 'index', 'error'],

    methods: {
        hasError(attribute) {
            return this.error[attribute] !== undefined;
        },

        getError(attribute) {
            return this.error[attribute][0];
        },
    },
};
</script>
I'm not going to go over all this code; it should be pretty straightforward if you know your way around Vue.
Something that has always bothered me is that in these Vue components, I can't make use of any partials or form helpers that are available server-side. Also, getting the errors from Laravel displayed into the component takes some effort. None of this is rocket science to solve, but still...
We've replaced these two Vue components with a single Livewire component. Let's take a look.
Here is the HttpHeaders component itself. I've added some comments to make it more clear.
namespace App\Http\Livewire;

use Livewire\Component;

class HttpHeaders extends Component
{
    /**
     * This array contains an array with a name and value for
     * each header we display.
     */
    public $headers = [];

    /**
     * This function will get called when ever the component
     * is rendered for the first time.
     */
    public function mount(array $headers)
    {
        /**
         * We first check if there are any old values for
         * the form elements we want to render.
         *
         * When a user has submitted a form with values that
         * didn't pass validation, we display those old values.
         */
        $this->headers = old('http_client_headers', $headers);
    }

    /**
     * This function will add an empty header value pair
     * causing an extra row to be rendered.
     */
    public function addHeader(): void
    {
        if (! $this->canAddMoreHeaders()) {
            return;
        }

        $this->headers[] = ['name' => '', 'value' => ''];
    }

    /**
     * Here we'll remove the item with the given key
     * from the headers array, so a rendered row will
     * disappear.
     */
    public function removeHeader(int $i): void
    {
        unset($this->headers[$i]);

        $this->headers = array_values($this->headers);
    }

    /**
     * This check is used both in this component class
     * and in the view.
     */
    public function canAddMoreHeaders(): bool
    {
        return count($this->headers) < 5;
    }

    public function render()
    {
        return view('livewire.http-headers');
    }
}
And here is that http-headers view.
<div>
    <div>
        @foreach($headers as $i => $header)
            <div class="flex mb-2">
                <div class="flex flex-col flex-grow">
                    <div class="mr-2 flex-grow">
                        <input
                            value="{{ $header['name'] }}"
                            placeholder="Header name"
                            type="text"
                            name="http_client_headers[{{ $i }}][name]"
                        >
                    </div>
                    @error("http_client_headers.{$i}.name")
                    <div>
                        <strong class="form-error">
                            {{ $errors->first("http_client_headers.{$i}.name") }}
                        </strong>
                    </div>
                    @enderror
                </div>

                <div class="flex flex-col flex-grow">
                    <div class="mr-2 flex-grow">
                        <input
                            value="{{ $header['value'] }}"
                            placeholder="Header value"
                            type="text"
                            name="http_client_headers[{{ $i }}][value]"
                        >
                    </div>
                    @error("http_client_headers.{$i}.value")
                    <div>
                        <strong class="form-error">
                            {{ $errors->first("http_client_headers.{$i}.value") }}
                        </strong>
                    </div>
                    @enderror
                </div>

                <div class="button is-secondary items-center">
                    <div wire:click.prevent="removeHeader({{ $i }})" class="text-xs text-gray-500">
                        Remove
                    </div>
                </div>
            </div>
        @endforeach
    </div>

    @if ($this->canAddMoreHeaders())
        <div wire:click.prevent="addHeader" class="button is-secondary mr-4">
            Add custom header
        </div>
    @endif
</div>
Again, not rocket science, but it's pretty beautiful. I didn't need to write a single line of JavaScript. I can make use of any Blade directive. I don't need to do anything special to handle errors.
This solution feels much lighter to me than resorting to Vue.
There's also a small drawback. Each time a user wants to add an extra header, "Add custom header" is going to get clicked, and the server will need to build up the additional HTML. When using Vue, there's no extra trip. In Oh Dear, however, the load that we get from the UI pales in comparison to the load we get from performing checks and crawling sites. So, I gladly accept this small drawback. The benefits that Livewire brings to the table outweigh the drawbacks.
Displaying notification preferences
Let's take a look at a more complex form. The core business of Oh Dear is to notify users when something is wrong. We support my notification channels, such as mail, SMS, Slack, Webhooks, Pushover, ... In our UI, users can specify which notifications should be sent to which channels.
Here's what it looks like.
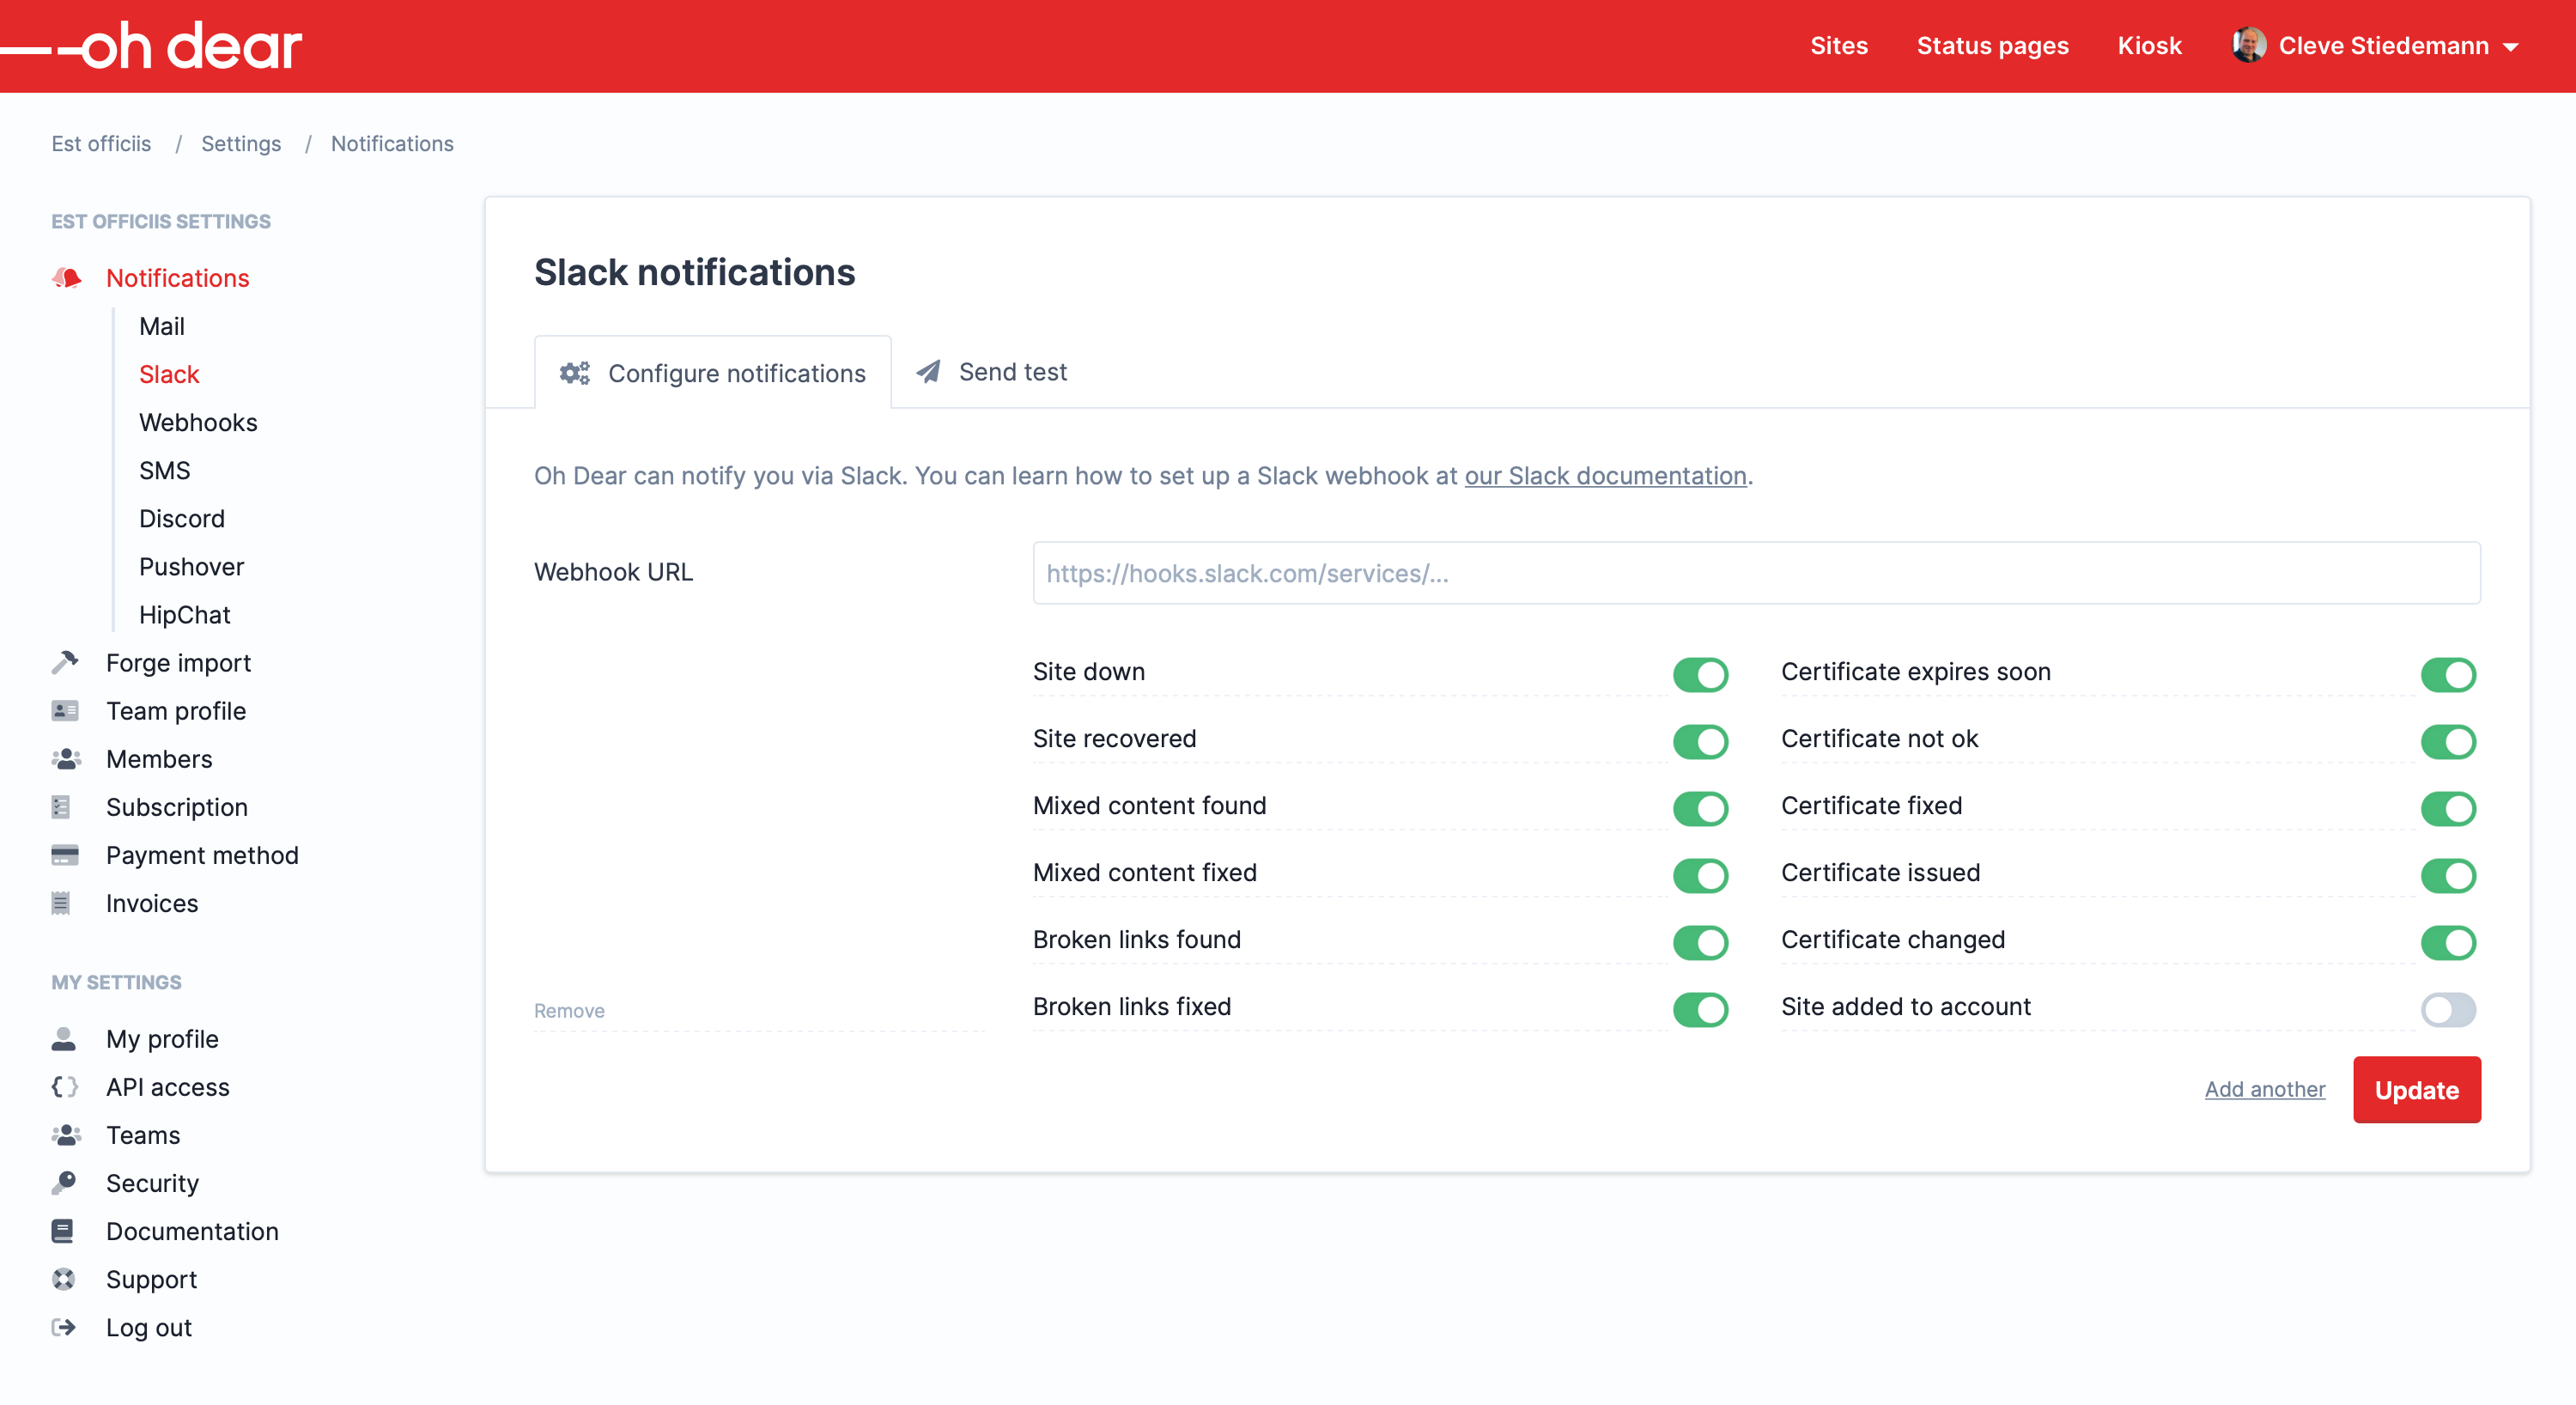
Much like the headers component, you can add multiple values.
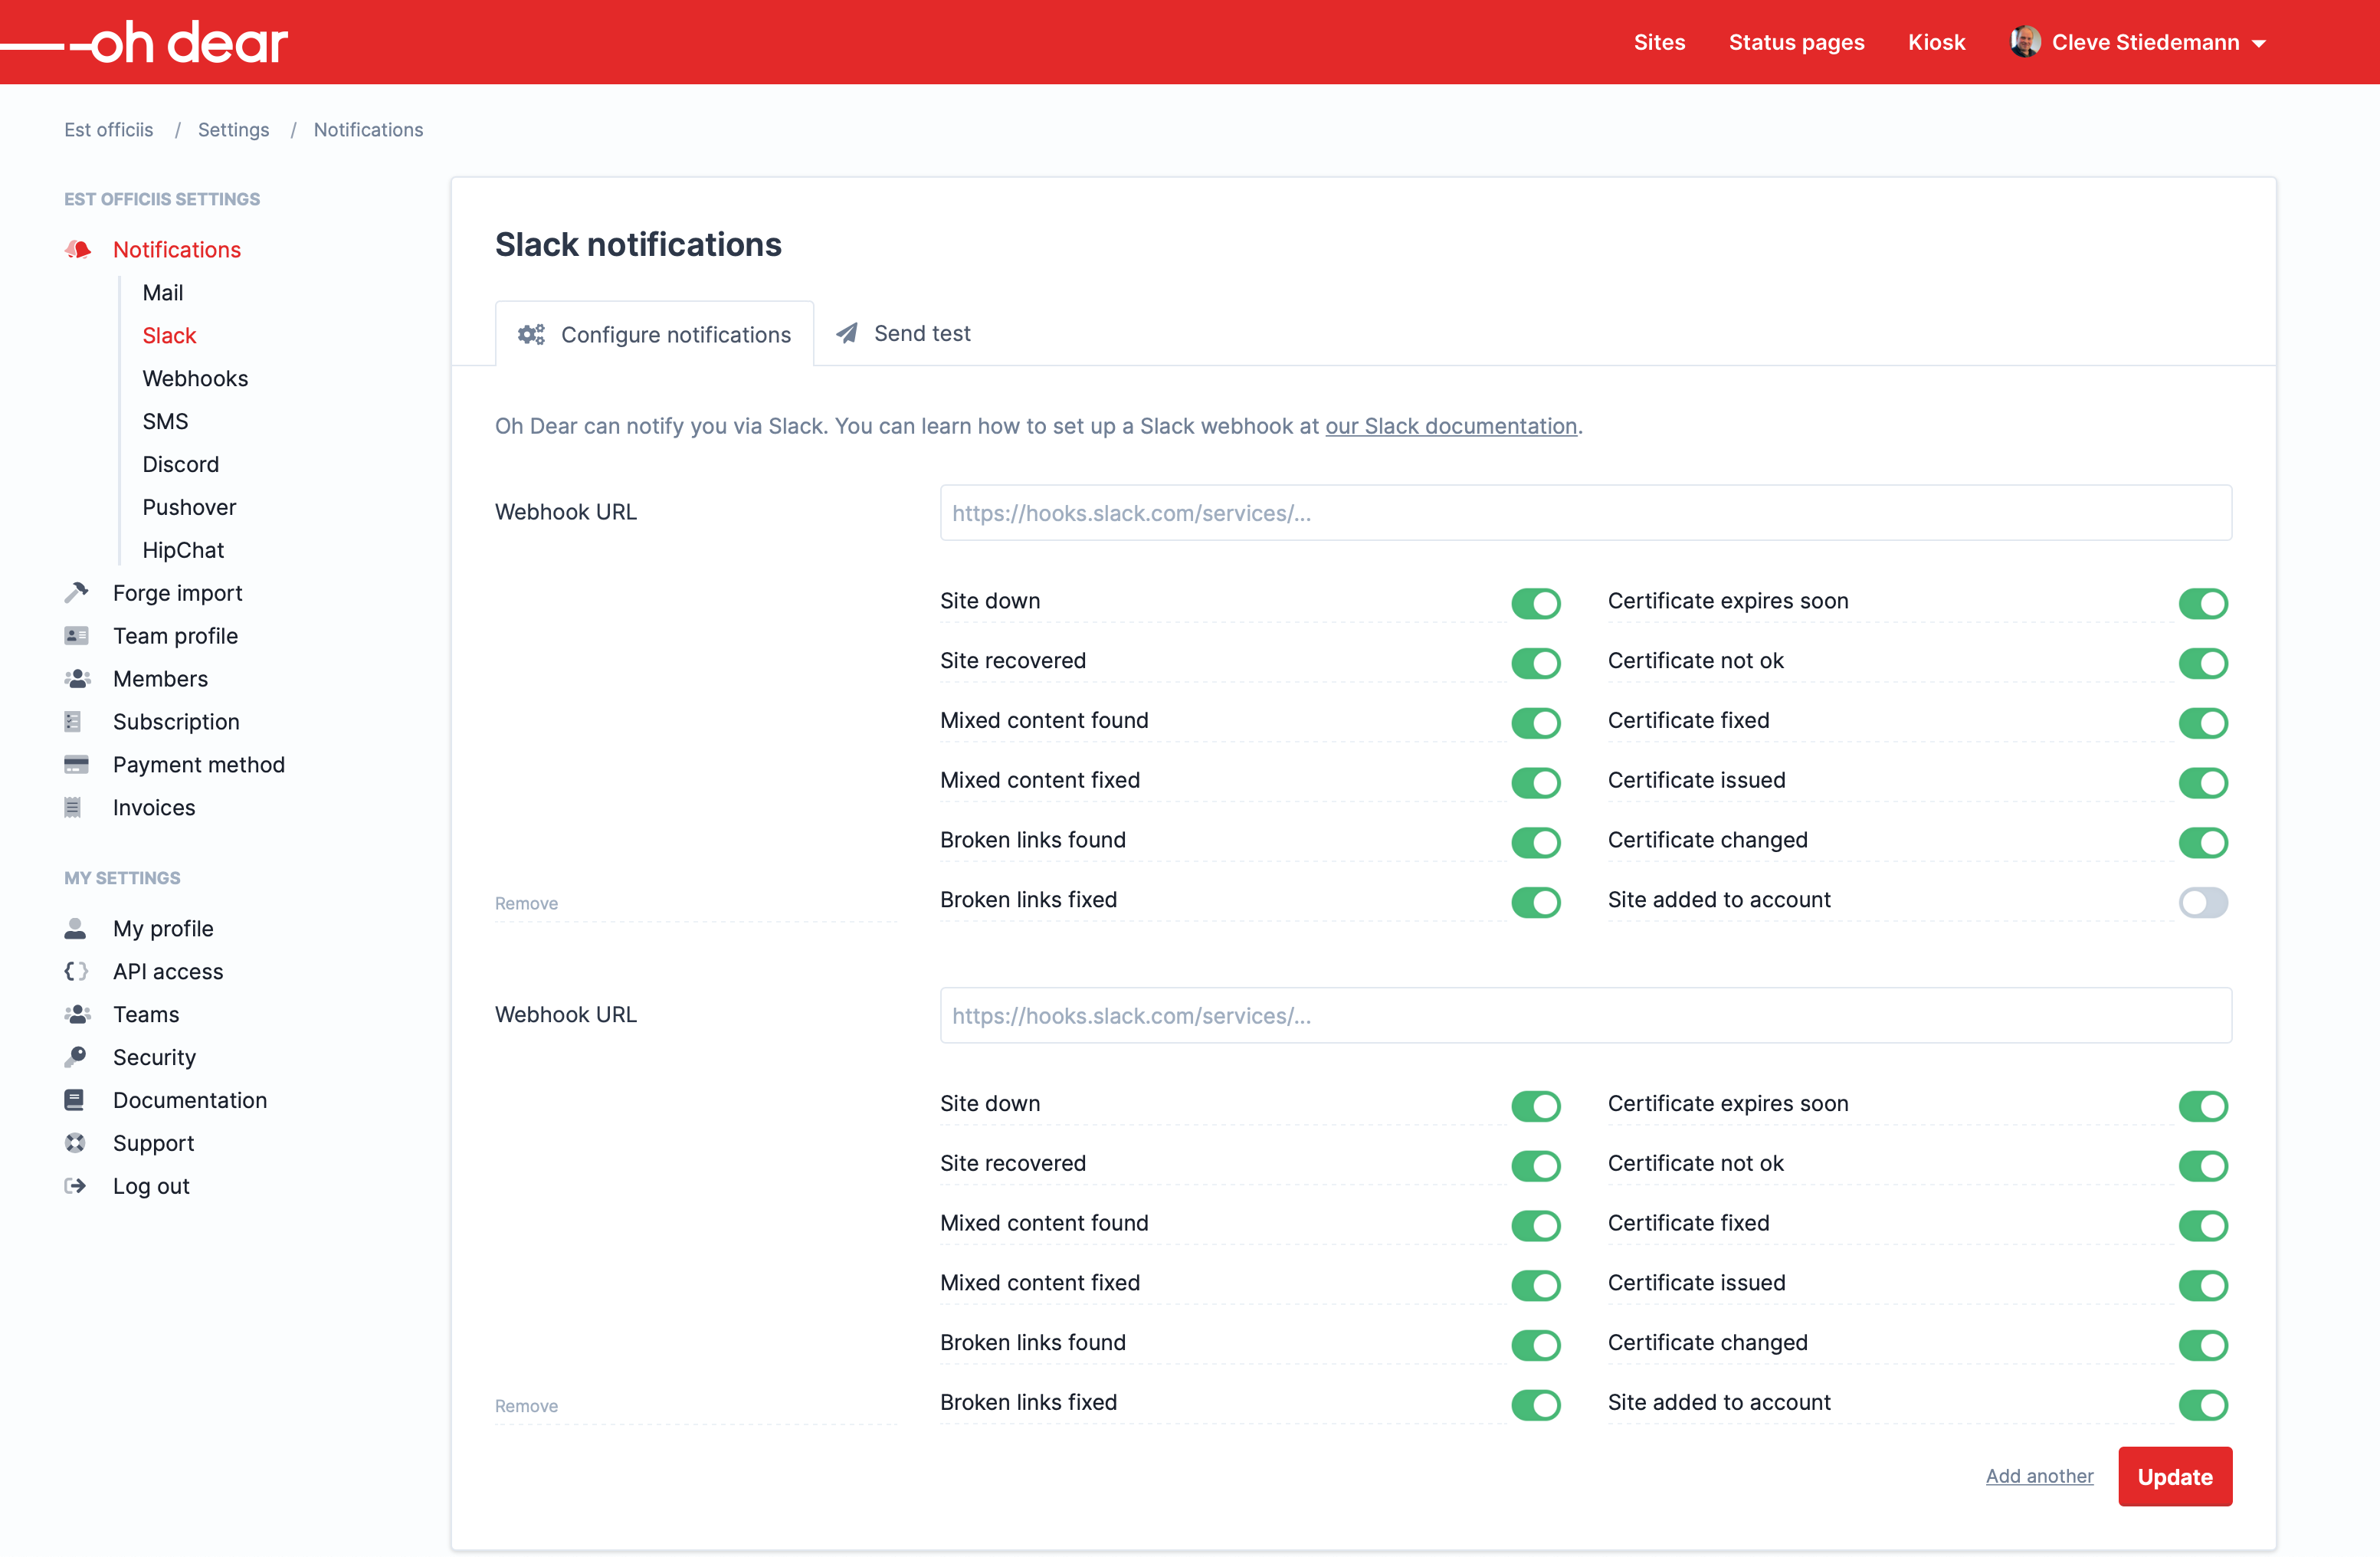
Something to keep in mind is that, for some channels, multiple form fields need to be rendered.
What's different compared to the headers component is that, by default, some form fields are shown. We don't display any form element by default for the http headers component, because most users don't need to set custom headers. When you're on the notification screen, you probably do want to set up or view your notification preference.
This form is a bit more complicated than the HTTP headers one. We have different form fields per channel, and we have a bunch of toggles.
Let's first take a look at the Vue components that we've ditched.
Here's NotificationDestinations.vue, which handles the entire collection of forms.
<template>
    <div class="mb-12">
        <h2 class="h2 mb-2">{{ title }}</h2>
        <p v-if="$slots.description" class="help mb-6">
            <slot name="description" />
        </p>
        <div class="alert is-success mb-4" v-if="form.successful">
            The notification settings have been updated!
        </div>
        <notification-destination
            v-for="(notificationDestination, index) in form.notification_destinations"
            :key="notificationDestination.id"
            :init-notification-destination="notificationDestination"
            :input-label="inputLabel + ' #' + (index + 1)"
            :validation-error="getValidationError(index)"
            :removable="removable"
            @remove="removeNotificationDestination(notificationDestination.id)"
        ></notification-destination>
        <div class="flex items-center justify-end mb-4">
            <button
                v-if="form.notification_destinations.length < 5"
                @click="addNotificationDestination"
                class="button is-secondary mr-4"
            >
                Add another {{ inputLabel.toLowerCase() }}
            </button>
            <button class="button" type="submit" @click.prevent="update" :disabled="form.busy">
                Update
            </button>
        </div>
    </div>
</template>

<script>
import NotificationDestination from './NotificationDestination';

export default {
    props: ['title', 'notificationDestinations', 'channel', 'inputLabel', 'updateEndpoint'],

    components: {
        NotificationDestination,
    },

    computed: {
        removable() {
            if (this.form.notification_destinations.length > 1) {
                return true;
            }

            return this.form.notification_destinations[0].destination != '';
        },
    },

    data() {
        return {
            form: new SparkForm({
                notification_destinations: [],
                channel: this.channel,
            }),
        };
    },

    mounted() {
        this.form.notification_destinations = this.notificationDestinations.map(
            (notificationDestination, index) => {
                notificationDestination.id = index;

                return notificationDestination;
            }
        );

        if (!this.form.notification_destinations.length) {
            this.form.notification_destinations.push(this.newDestination());
        }
    },

    methods: {
        async update() {
            await Spark.put(this.updateEndpoint, this.form);
        },

        addNotificationDestination() {
            this.form.notification_destinations.push(this.newDestination());
        },

        removeNotificationDestination(id) {
            const destinations = this.form.notification_destinations.filter(
                destination => destination.id !== id
            );

            if (!destinations.length) {
                destinations.push(this.newDestination());
            }

            this.$set(this.form, 'notification_destinations', destinations);
        },

        getValidationError(index) {
            return this.form.errors.get(`notification_destinations.${index}`);
        },

        newDestination() {
            return {
                id: this.form.notification_destinations.length,
                channel: this.channel,
                destination: {},
                accepts_notification_classes: [
                    'CertificateExpiresSoon',
                    'CertificateFixed',
                    'CertificateHasChanged',
                    'CertificateUnhealthy',
                    'CertificateIssued',
                    'MixedContentFixed',
                    'MixedContentFound',
                    'BrokenLinksFixed',
                    'BrokenLinksFound',
                    'UptimeCheckRecovered',
                    'UptimeCheckFailed',
                    'SiteAdded',
                ],
            };
        },
    },
};
</script>
This is the code of NotificationDestination.vue, which handles a single form.
<template>
    <div>
        <p class="alert is-danger is-small mb-2" v-show="validationError">
            {{ validationError }}
        </p>

        <div
            :is="this.channelComponentName"
            :input-label="inputLabel"
            :notification-destination="notificationDestination"
        ></div>
        <div class="notification-toggles" :class="{ 'is-removable': removable }">
            <div class="notification-toggles-left">
                <button v-if="removable" class="text-xs text-gray-500" @click="$emit('remove')">
                    Remove
                </button>
            </div>
            <div class="notification-toggles-right">
                <div v-for="toggle in toggles" :key="toggle.type" class="inline-block w-full">
                    <notification-toggle
                        :label="toggle.label"
                        :type="toggle.type"
                        :checked="acceptsNotification(toggle.type)"
                        @change="updateAcceptsNotification"
                    ></notification-toggle>
                </div>
            </div>
        </div>
    </div>
</template>

<script>
import NotificationToggle from './NotificationToggle';
import HipChat from './Channels/HipChat';
import Slack from './Channels/Slack';
import Discord from './Channels/Discord';
import Mail from './Channels/Mail';
import Pushover from './Channels/Pushover';
import Nexmo from './Channels/Nexmo';
import Webhook from './Channels/Webhook';

export default {
    props: ['initNotificationDestination', 'inputLabel', 'validationError', 'removable'],

    components: {
        NotificationToggle,
        Slack,
        Discord,
        HipChat,
        Mail,
        Pushover,
        Nexmo,
        Webhook,
    },

    computed: {
        channelComponentName() {
            return (
                this.notificationDestination.channel.charAt(0).toUpperCase() +
                this.notificationDestination.channel.slice(1)
            );
        },
    },

    data() {
        return {
            notificationDestination: {},
            toggles: _.sortBy(
                [
                    { type: 'UptimeCheckFailed', label: 'Site down' },
                    { type: 'UptimeCheckRecovered', label: 'Site recovered' },
                    { type: 'MixedContentFound', label: 'Mixed content found' },
                    { type: 'MixedContentFixed', label: 'Mixed content fixed' },
                    { type: 'BrokenLinksFound', label: 'Broken links found' },
                    { type: 'BrokenLinksFixed', label: 'Broken links fixed' },
                    { type: 'CertificateExpiresSoon', label: 'Certificate expires soon' },
                    { type: 'CertificateUnhealthy', label: 'Certificate not ok' },
                    { type: 'CertificateFixed', label: 'Certificate fixed' },
                    { type: 'CertificateIssued', label: 'Certificate issued' },
                    { type: 'CertificateHasChanged', label: 'Certificate changed' },
                    { type: 'SiteAdded', label: 'Site added to account' },
                ],
                'label'
            ),
        };
    },

    created() {
        this.notificationDestination = this.initNotificationDestination;
    },

    methods: {
        acceptsNotification(notificationType) {
            return this.notificationDestination.accepts_notification_classes.includes(
                notificationType
            );
        },

        updateAcceptsNotification(notificationClass, accepts) {
            if (accepts) {
                this.notificationDestination.accepts_notification_classes.push(notificationClass);

                return;
            }

            const newNotifificationClasses = this.notificationDestination.accepts_notification_classes.filter(
                existingNotificationClass => existingNotificationClass !== notificationClass
            );

            return (this.notificationDestination.accepts_notification_classes = newNotifificationClasses);
        },
    },
};
</script>
Here is the Slack.vue component which was responsible for rendering the Slack specific fields.
<template>
    <label class="form-group is-row">
        <span class="label">{{ inputLabel }}</span>
        <input
            placeholder="https://hooks.slack.com/services/..."
            type="text"
            v-model="notificationDestination.destination.url"
            name="webhook_url"
        />
    </label>
</template>

<script>
export default {
    props: ['notificationDestination', 'inputLabel'],
};
</script>
You don't need to go through the entire Vue code. I just want to stress that quite some code was required to make this work.
Now let's look at the Livewire component that replaces the Vue components above.
First, let's take a look at the controller that will render the view.
namespace App\Http\App\Controllers\Settings\Team\Notifications\Channels;

use App\Http\App\Controllers\Settings\Team\Notifications\Channels\Concerns\HandlesTeamNotificationDestinations;
use App\Http\App\Requests\Notifications\UpdateSlackNotificationsRequest;

class SlackTeamNotificationsController
{
    use HandlesTeamNotificationDestinations;

    public $channel = 'slack';

    public function update(UpdateSlackNotificationsRequest $request)
    {
        return $this->handleUpdateRequest($request);
    }
}
We have a controller per channel. The real meat of the functionality is in the BuildsTeamNotificationsTestView trait. When working with controllers, I generally prefer moving common functionality to traits and not to (abstract) base classes because you can apply multiple traits to a class, but you can only have one class where you can extend from.
The update method is overridden so I can use a specific form request for validation.
Here's that UpdateSlackNotificationsRequest.
namespace App\Http\App\Requests\Notifications;

use App\Domain\Notification\Rules\NotificationDestinationTypeRule;
use App\Domain\Site\Rules\UrlRule;
use Illuminate\Foundation\Http\FormRequest;

class UpdateSlackNotificationsRequest extends FormRequest
{
    public function rules()
    {
        return [
            'notification_destinations' => 'array|max:5',
            'notification_destinations.*.destination.url' => [new UrlRule()],
            'notification_destinations.*.accepts_notification_classes.*' => [new NotificationDestinationTypeRule()],
        ];
    }
}
The request makes it clear that we accept two arrays back
notification_destinations.*.destination and notification_destinations.*.accepts_notification_classes. In destination all specific configuration values of the channel are expected.accepts_notification_classes should hold all types of notification that should be sent to this notification destination.
It surprises exactly no-one that the controller for handling Nexmo notifications looks quite similar.
namespace App\Http\App\Controllers\Settings\Team\Notifications\Channels;

use App\Http\App\Controllers\Settings\Team\Notifications\Channels\Concerns\HandlesTeamNotificationDestinations;
use App\Http\App\Requests\Notifications\UpdateNexmoNotificationsRequest;

class NexmoTeamNotificationsController
{
    use HandlesTeamNotificationDestinations;

    public $channel = 'nexmo';

    public function update(UpdateNexmoNotificationsRequest $request)
    {
        return $this->handleUpdateRequest($request);
    }
}
Let's take a look at the HandlesTeamNotificationDestinations trait.
namespace App\Http\App\Controllers\Settings\Team\Notifications\Channels\Concerns;

use Illuminate\Http\Request;

trait HandlesTeamNotificationDestinations
{
    public function edit()
    {
        $channel = $this->channel;

        $notificationDestinations = currentTeam()
            ->notificationDestinationsForChannel($channel)
            ->toArray();

        return view("app.settings.team.notifications.channels.{$this->channel}", compact(
            'notificationDestinations',
            'channel'
        ));
    }

    public function handleUpdateRequest(Request $request)
    {
        currentTeam()->setNotificationDestinationsForChannel(
            $this->channel,
            $request->validated(),
        );

        $channelLabel = ucfirst($this->channel);

        flash()->success("The {$channelLabel} notification preferences have been updated.");

        return back();
    }
}
Here you can see that the actual handleUpdateRequest logic is the same for all notification channels.
In edit you see that there is a specific view per channel. Let's take a look at the app.settings.team.notifications.channels.slack view.
@component('app.sites.components.page', [
    'site' => $site,
    'breadcrumbs' => ['site-notifications', $site],
])
    <div class="card">
        <x-site-notification-header channel="slack" :site="$site" />

            <p class="help mb-4">
                Oh Dear can notify you via Slack. You can learn how to set up a Slack webhook at <a href="/docs/notifications/slack">our Slack documentation</a>.
            </p>

        <livewire:slack-notification-destinations :notificationDestinations="$notificationDestinations"/>
    </div>
@endcomponent
The view above uses the old @component notation to extend from app.sites.components.page, which contains the general application layout. In a future refactor, we'll probably refactor this to Laravel 7 style Blade components.
To render the header of the card (which contains the title and the tabs), a blade component is already used. Last, you can see that we render a Livewire component slack-notification-destinations. In a future refactor, I might wrap this up in a Blade component.
Here is the class component that backs slack-notification-destinations.
namespace App\Http\Livewire;

class SlackNotificationDestinations extends NotificationDestinations
{
    public function fields(): array
    {
        return [
            ['name' => 'url', 'label' => 'Webhook URL', 'placeholder' => 'https://hooks.slack.com/services/...'],
        ];
    }
}
So this one only holds the field definitions for the channel.
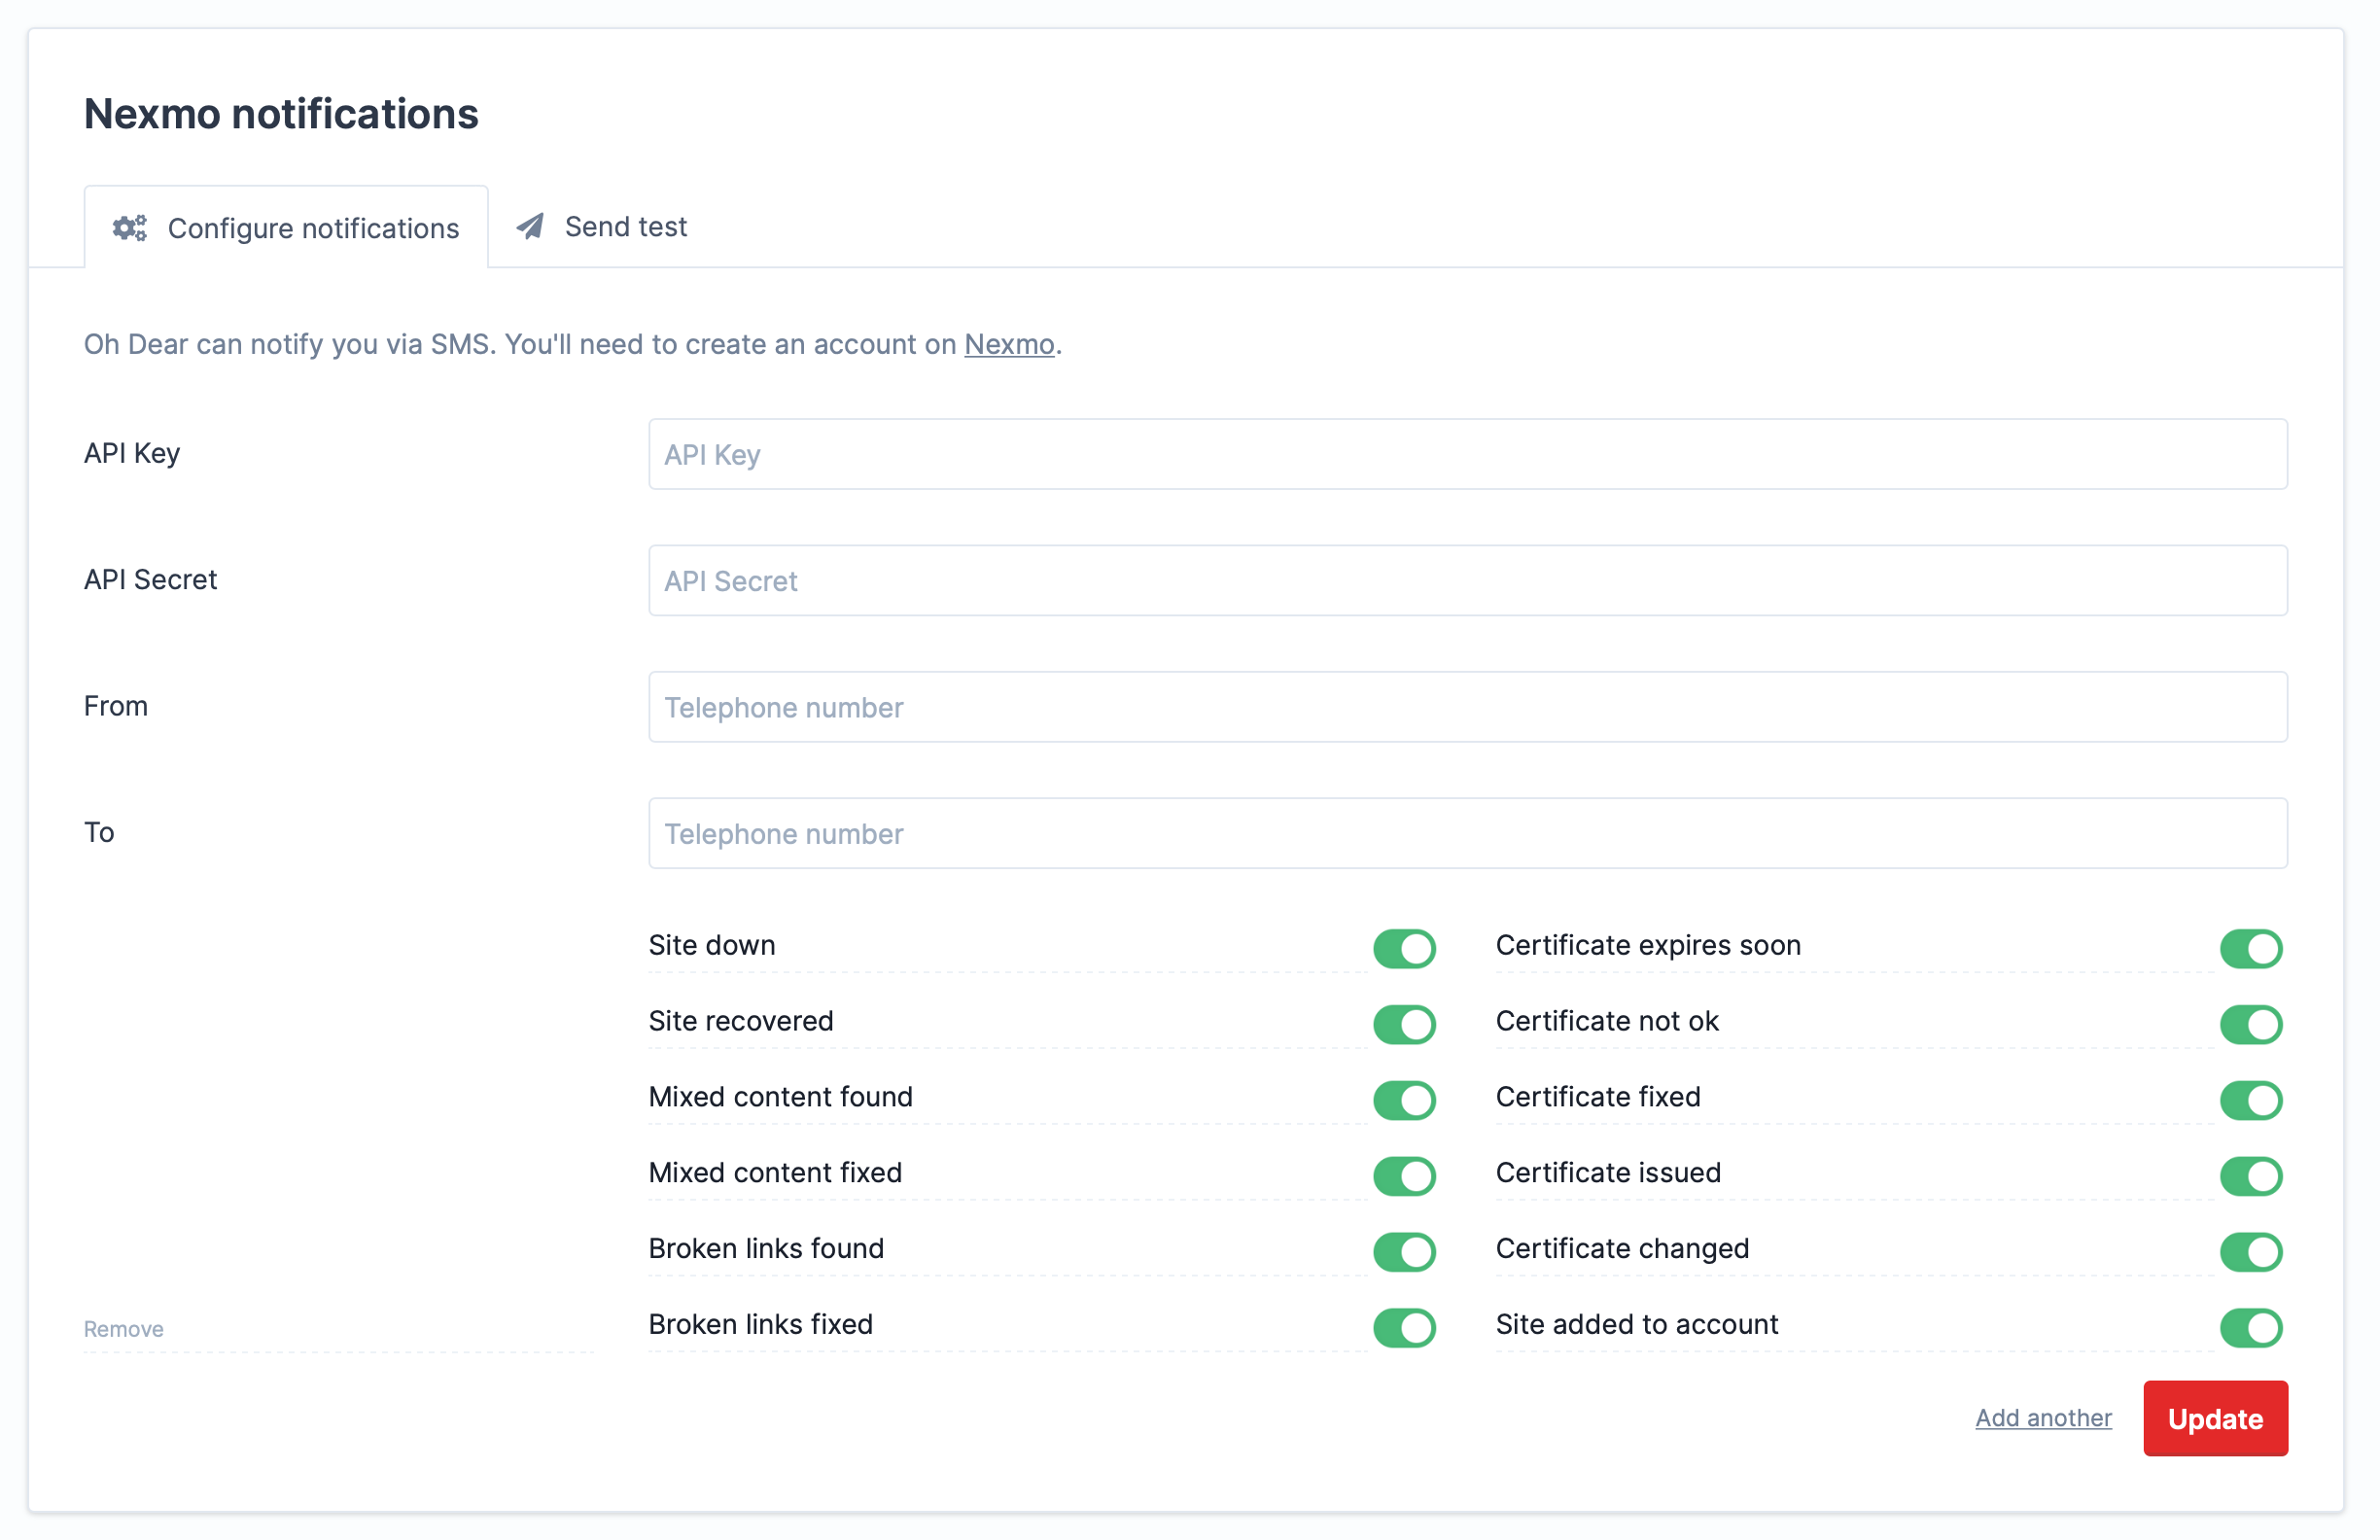
When looking at the Nexmo specific one, you'll see other fields.
namespace App\Http\Livewire;

class NexmoNotificationDestinations extends NotificationDestinations
{
    public function fields(): array
    {
        return [
            ['name' => 'apiKey', 'label' => 'API Key', 'placeholder' => 'API Key'],
            ['name' => 'apiSecret', 'label' => 'API Secret', 'placeholder' => 'API Secret', 'type' => 'password'],
            ['name' => 'from', 'label' => 'From', 'placeholder' => 'Telephone number'],
            ['name' => 'to', 'label' => 'To', 'placeholder' => 'Telephone number'],
        ];
    }
}
The meat functionality of this component is the NotificationDestinations where the channel-specific components extend from. I've added some comments to make it more clear.
namespace App\Http\Livewire;

use App\Domain\Notification\Models\NotificationDestination as NotificationDestinationModel;
use Illuminate\View\View;
use Livewire\Component;

abstract class NotificationDestinations extends Component
{
    public array $notificationDestinations = [];

    public $listeners = ['removeNotificationDestination'];

    /**
     *  Here the notification destinations from the server
     * are passed to the components.
     *
     * If there are none defined, we are going to add an empty so at least
     * an empty form is being displayed at all times.
     */
    public function mount(array $notificationDestinations): void
    {
        $notificationDestinations = old('notification_destinations', $notificationDestinations);


        if (count($notificationDestinations) === 0) {
            $notificationDestinations[] = $this->defaults();
        }

        $this->notificationDestinations = $notificationDestinations;
    }

    public function add(): void
    {
        if (! $this->canAddMoreNotificationDestinations()) {
            return;
        }

        $this->notificationDestinations[] = $this->defaults();
    }

    public function removeNotificationDestination(int $index): void
    {
        unset($this->notificationDestinations[$index]);

        if (count($this->notificationDestinations) === 0) {
            $this->notificationDestinations[] = $this->defaults();
        }
    }

    public function canAddMoreNotificationDestinations(): bool
    {
        return count($this->notificationDestinations) < 5;
    }

    public function render(): View
    {
        return view('livewire.notification-destinations');
    }

    /*
     * We are going to merge the channel-specific fields with the possible notification
     * types (these are the values that back all the checkboxes)
     */
    protected function defaults(): array
    {
        $channelSpecifiedFields = collect($this->fields())->map(function (array $field) {
            return [$field['name'] => ''];
        })->toArray();

        $notificationTypes = NotificationDestinationModel::notificationTypes()->pluck('type')->toArray();

        return array_merge(
            ['accepts_notification_classes' => $notificationTypes],
            $channelSpecifiedFields,
        );
    }

    abstract public function fields(): array;
}
And here's the notification-destinations view.
<form method="POST">
    @method('PUT')
    @csrf

    <div>
        @foreach($notificationDestinations as $i => $notificationDestination)
            <livewire:notification-destination
                :key="$i"
                :fields="$this->fields()"
                :notificationDestination="$notificationDestination"
                :index="$i"
            />

        @endforeach

        <div class="flex items-center justify-end mb-4">
            @if ($this->canAddMoreNotificationDestinations())
                <button wire:click.prevent="add" class="button is-secondary mr-4">
                    Add another
                </button>
            @endif
            <button type="submit" class="button">
                Update
            </button>
        </div>
    </div>
</form>
This view is responsible for rendering the outer form, the "Add another", and "Update" button. The form fields themselves are rendered in the livewire:notification-destination component. It gets passed the definitions of the fields and the notification destination values. Let's take a look at that component.
namespace App\Http\Livewire;

use Illuminate\View\View;
use Livewire\Component;

class NotificationDestination extends Component
{
    public int $index = 0;

    public array $notificationDestination = [];

    public array $fields = [];

    public function mount(int $index, array $notificationDestination, array $fields): void
    {
        $this->index = $index;

        $this->notificationDestination = $notificationDestination;

        $this->fields = $fields;
    }

    public function render(): View
    {
        return view('livewire.notification-destination');
    }

    public function remove(): void
    {
        $this->emitUp('removeNotificationDestination', $this->index);
    }
}
You can see, it's a straightforward component. The only thing to note here is that when remove is called, it emits up an event where the NotificationDestinations component. This is done because that component is in charge of the state. NotificationDestinations will execute removeNotificationDestination, which will update its notificationDestinations array, which will re-render the entire component.
Let's take a look at the notification-destination view.
<div class="mt-8">
    @foreach($fields as $field)
        <label class="form-group is-row">

            <span class="label">{{ $field['label'] }}</span>
            <input placeholder="{{ $field['placeholder'] }}"
                   value="{{ $notificationDestination['destination'][$field['name']] ?? '' }}"
                   type="{{ $field['type'] ?? 'text' }}"
                   name="notification_destinations[{{ $index }}][destination][{{ $field['name'] }}]"
            >
        </label>

        @error("notification_destinations.{$index}.destination.{$field['name']}")
        <div class="-mt-4 mb-4">
            <strong class="form-error">
                {{ $errors->first("notification_destinations.{$index}.destination.{$field['name']}") }}
            </strong>
        </div>
        @enderror
    @endforeach

    <div class="notification-toggles is-removable">
        <div class="notification-toggles-left">
            <button wire:click.prevent="remove" class="text-xs text-gray-500">
                Remove
            </button>
        </div>

        @include('app.settings.team.notifications.partials.notifications', [
             'enabledNotificationTypes' => $notificationDestination['accepts_notification_classes'],
             'index' => $index,
            ])
    </div>
</div>
In the code above, you can see the specific fields being rendered based on their definition.
And that is all there is to it!
In closing
Working with Livewire was fun. It enabled us to write some complex form and behaviors without having to write a single line of JavaScript. It makes these forms more maintainable and also more testable.
If you want to see these forms in action, start a free Oh Dear trial and head over to the team notifications screen. When you click "Add another", or "Remove", you might want to open your inspector so you can see the chunks of server-rendered HTML being passed to the client. Beautiful!
For more on Livewire, be sure to read the Livewire docs and follow Caleb Porzio on Twitter.