Selling digital products using Laravel part 4: Making a sale using Paddle original
In this part of the series we'll explore how we use Paddle to actually sell products at spatie.be.
- Part 4: Making a sale using Paddle (you are here)
In SaaS products I worked on, like Flare and Oh Dear, all payments are handled and processed by Stripe. Once set up, Stripe works well, but it has one big downside. As a seller, you are responsible for calculating the correct amount of tax depending on the seller's country and company type. American readers might think, "so what?" but in Europe, there are fairly complicated rules for this. Also, each sale you make results in an invoice that an accountant needs to process.
For sales on our company website, we decided to go with Paddle instead of Stripe. Paddle acts as a merchant of record. This means that, legally speaking, they sell our products. They take care of calculating taxes and are responsible that this is handled correctly. They invoice the buyers of our product. This also means that at the end of the month, we only have to invoice Paddle for the total amount of sales made. Our accountant only needs to process one invoice. Sure, Paddle is slightly more expensive than Stripe, but not having to handle calculating taxes and all those individual buyer invoices yourself makes up for it.
Displaying a buy button
Selling something through Paddle is easy. You have to define a product at their end. The created product ID is used in the check out process. Paddle offers a JavaScript widget that you can embed on your site.
You don't need to handle that Paddle integration manually. On our website, we use laravel-cashier. This first party package contains a Blade view, x-paddle-button that contains the necessary JS code to display the check out widget.
This is how that button component looks like in the browser. It is displayed on each product detail page when you are logged in.
Here's a snippet, taken from priceCard.blade.php, where the x-paddle-component is used.
<x-paddle-button :url="auth()->user()->getPayLinkForProductId($purchasable->paddle_product_id)" data-theme="none">
<x-button>
<span class="font-normal">Buy for </span>
<span data-id="current-currency-{{ $purchasable->id }}"></span>
<span data-id="current-price-{{ $purchasable->id }}"></span>
</x-button>
</x-paddle-button>
You can think of that $purchasable as something you can purchase. In our data model, a product is something like "Mailcoach". A product can have multiple purchasables. In the case of Mailcoach, those are:
- a single domain license
- an unlimited domains license
- a license renewal
- the video course
Each purchasable in our database matches a product defined at Paddle's end. In the snippet above, you see that we get paddle_product_id from the purchasable.
That getPayLinkForProductId method is a convenience method we put on the User model. This is the implementation.
public function getPayLinkForProductId(string $productId): string
{
    return $this->chargeProduct($productId, [
        'quantity_variable' => false,
        'customer_email' => auth()->user()->email,
        'marketing_consent' => true,
    ]);
}
Implementing purchasing power parity
Paddle has a built-in feature to use local currencies. Using this feature, a visitor from the USA sees the price in dollars, someone from Brazil sees the price in Real, and so on. Here's a screenshot of the Paddle prices screen (taking from their docs).
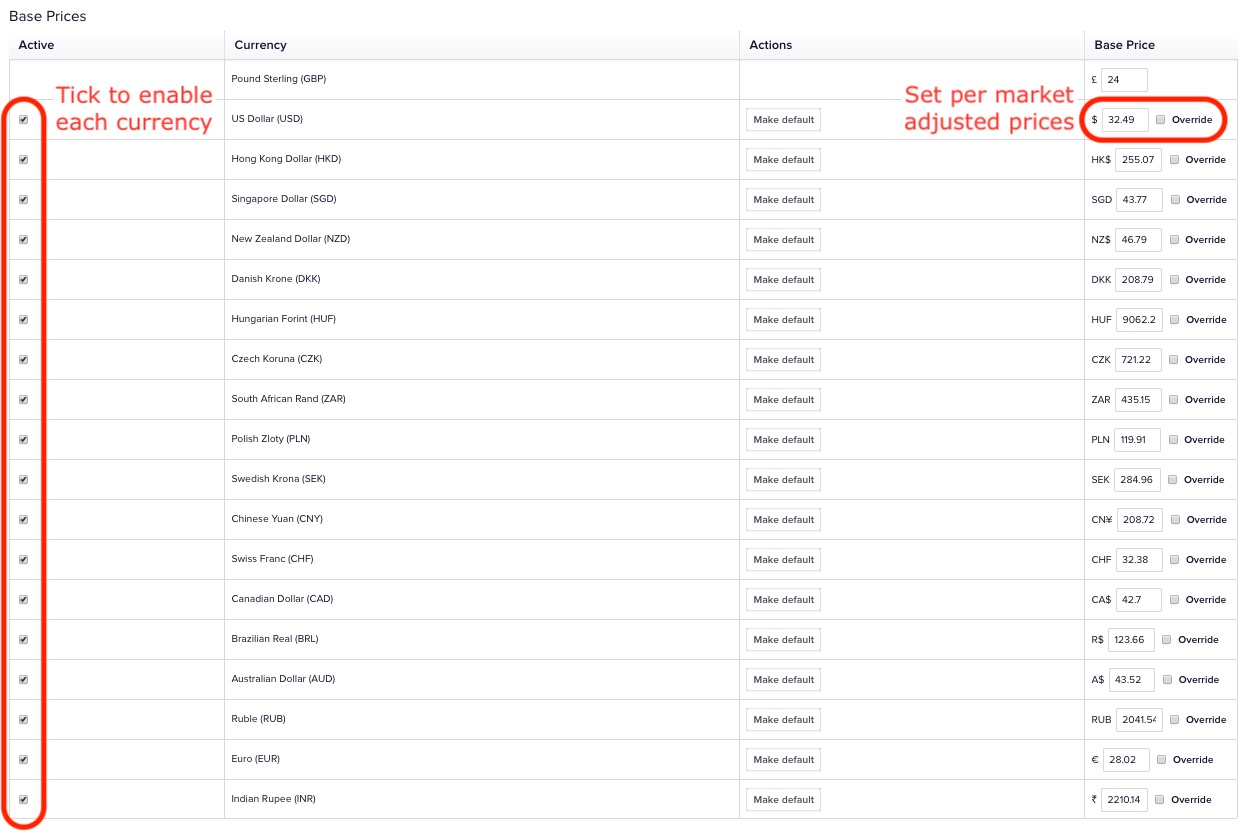
This feature can be used to provide purchasing power parity. Each country in the world has a different "buying power". A price of $199 is probably more affordable in the USA than in other countries. Using a fixed price for your products will likely result in people in some countries perceiving those products as overpriced.
A way to determine a country's buying power is by using the Big Mac Index. McDonald's already does work determining the right price of a Big Mac in each country. If McDonald's sells a Big Mac in a country for 30% less, it might be a good idea to lower your prices in that country for 30% less as well.
For our products, we enabled localized currencies for all countries supported by Paddle. For each country, we manually input the price for the country according to the Big Mac index.
Let's take a look at how we retrieve the right price to be displayed on our site. In the priceCard.blade.php snippet above, you might have noticed that no price is displayed. Instead, these two lines are included.
<span data-id="current-currency-{{ $purchasable->id }}"></span>
<span data-id="current-price-{{ $purchasable->id }}"></span>
Those two spans are filled by a JavaScript snippet that's included in that view. Here's the snippet, slightly modified for brevity.
Paddle.Product.Prices({{ $purchasable->paddle_product_id }}, function(prices) {
    let priceString = prices.price.net;
    let indexOFirstDigitInString = indexOfFirstDigitInString(priceString);
    let price = priceString.substring(indexOFirstDigitInString);
    price = price.replace('.00', '');

    let currencySymbol = priceString.substring(0,indexOFirstDigitInString);

    document.querySelectorAll('[data-id="current-currency-{{ $purchasable->id}}"]').forEach((element) => {
        element.innerHTML = currencySymbol;
    });
    document.querySelectorAll('[data-id="current-price-{{ $purchasable->id }}"]').forEach((element) => {
        element.innerHTML = price;
    });
});
The Paddle.Product.Prices function in the code above accepts a callable that will be given the prices for the visitor's country. This way, we don't need to do anything to determine the country of the visitor. That's being handled within Paddle.Product.Prices.
And that's all there is to provide purchase power parity. This approach works rather well, but there are two downsides. Right now, Paddle only supports 30 or so countries for custom prices. Ideally, all countries would be supported. A second downside is that we must manually adjust the countries' prices when the Big Mac index changes.
We hope that Paddle will add some more countries soon. If not, we'll probably add country detection of our own and manually calculate the right price per purchase. Instead of manually inputting a country-specific price, we might invest some time to use the Paddle API to update the prices using an API like this one.
Accepting a sale
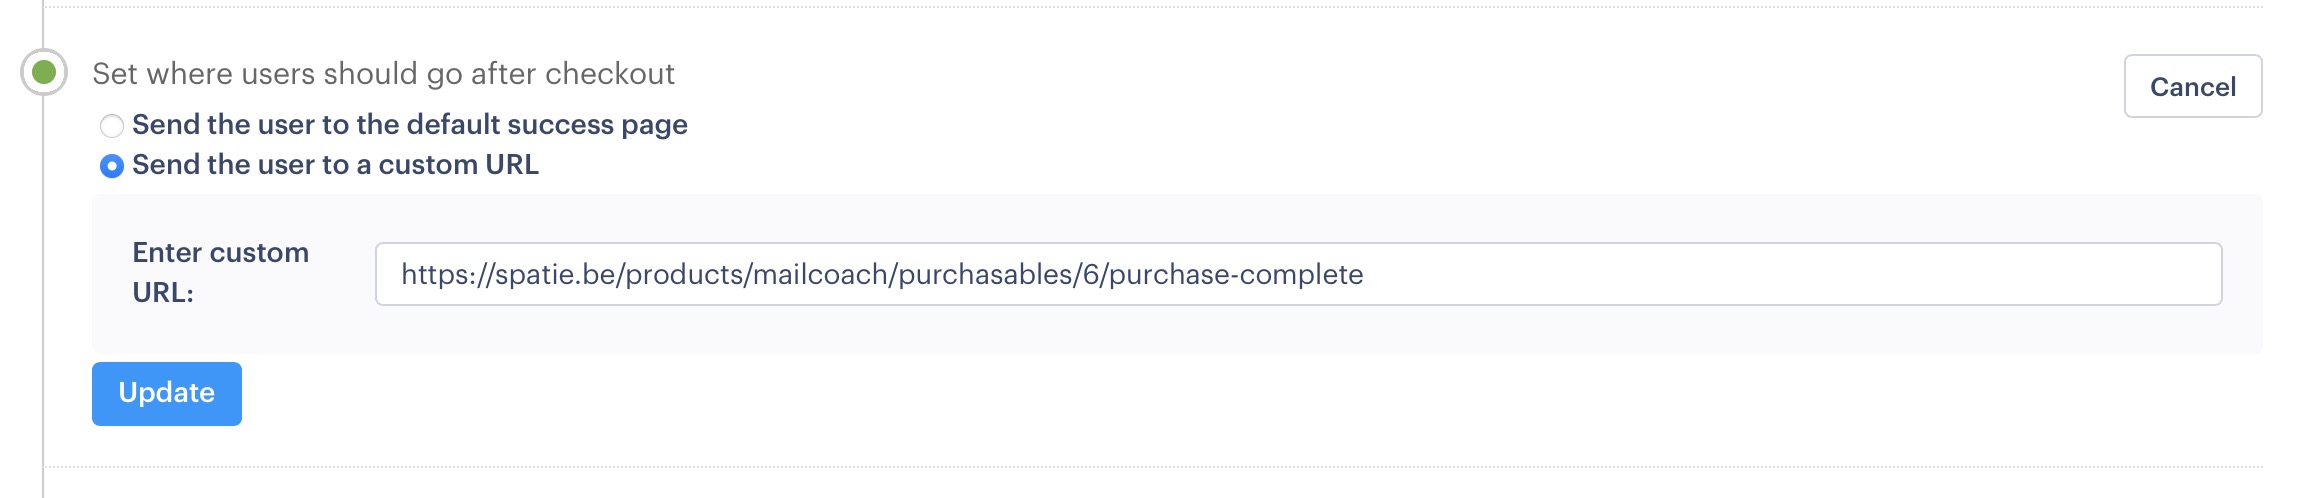
Now that you know how Paddle's checkout overlay can be displayed with a country-specific price, let's take a look at how a sale can be accepted. Whenever people complete the checkout flow and have bought a product, they get redirected to and URL like https://spatie.be/products/mailcoach/purchasables/3/purchase-complete. This redirection URL can be configured in the product settings at Paddle.
This is the AfterPaddleSaleController controller to which we redirect after each sale. Its content might surprise you.
namespace App\Http\Controllers;

use App\Models\Product;
use App\Models\Purchasable;
use Illuminate\Http\Request;

class AfterPaddleSaleController
{
    public function __invoke(Request $request, Product $product, Purchasable $purchasable)
    {
        sleep(3);

        session()->flash('sold_purchasable', $purchasable);

        flash()->success('Purchase successful');

        return redirect()->route('products.show', $product);
    }
}
That's right; we just wait for a couple of seconds. During these three seconds, Paddle will have sent a webhook that confirms that valid payment has been made.
For all products, we have configured Paddle to, after each sale, send a webhook to https://spatie.be/paddle/webhook. This is the WebhookController that will handle that webhook.
class WebhookController extends CashierWebhookController
{
    public function handlePaymentSucceeded($payload): void
    {
        parent::handlePaymentSucceeded($payload);

        dispatch(new ProcessPaymentSucceededJob($payload));
    }
}
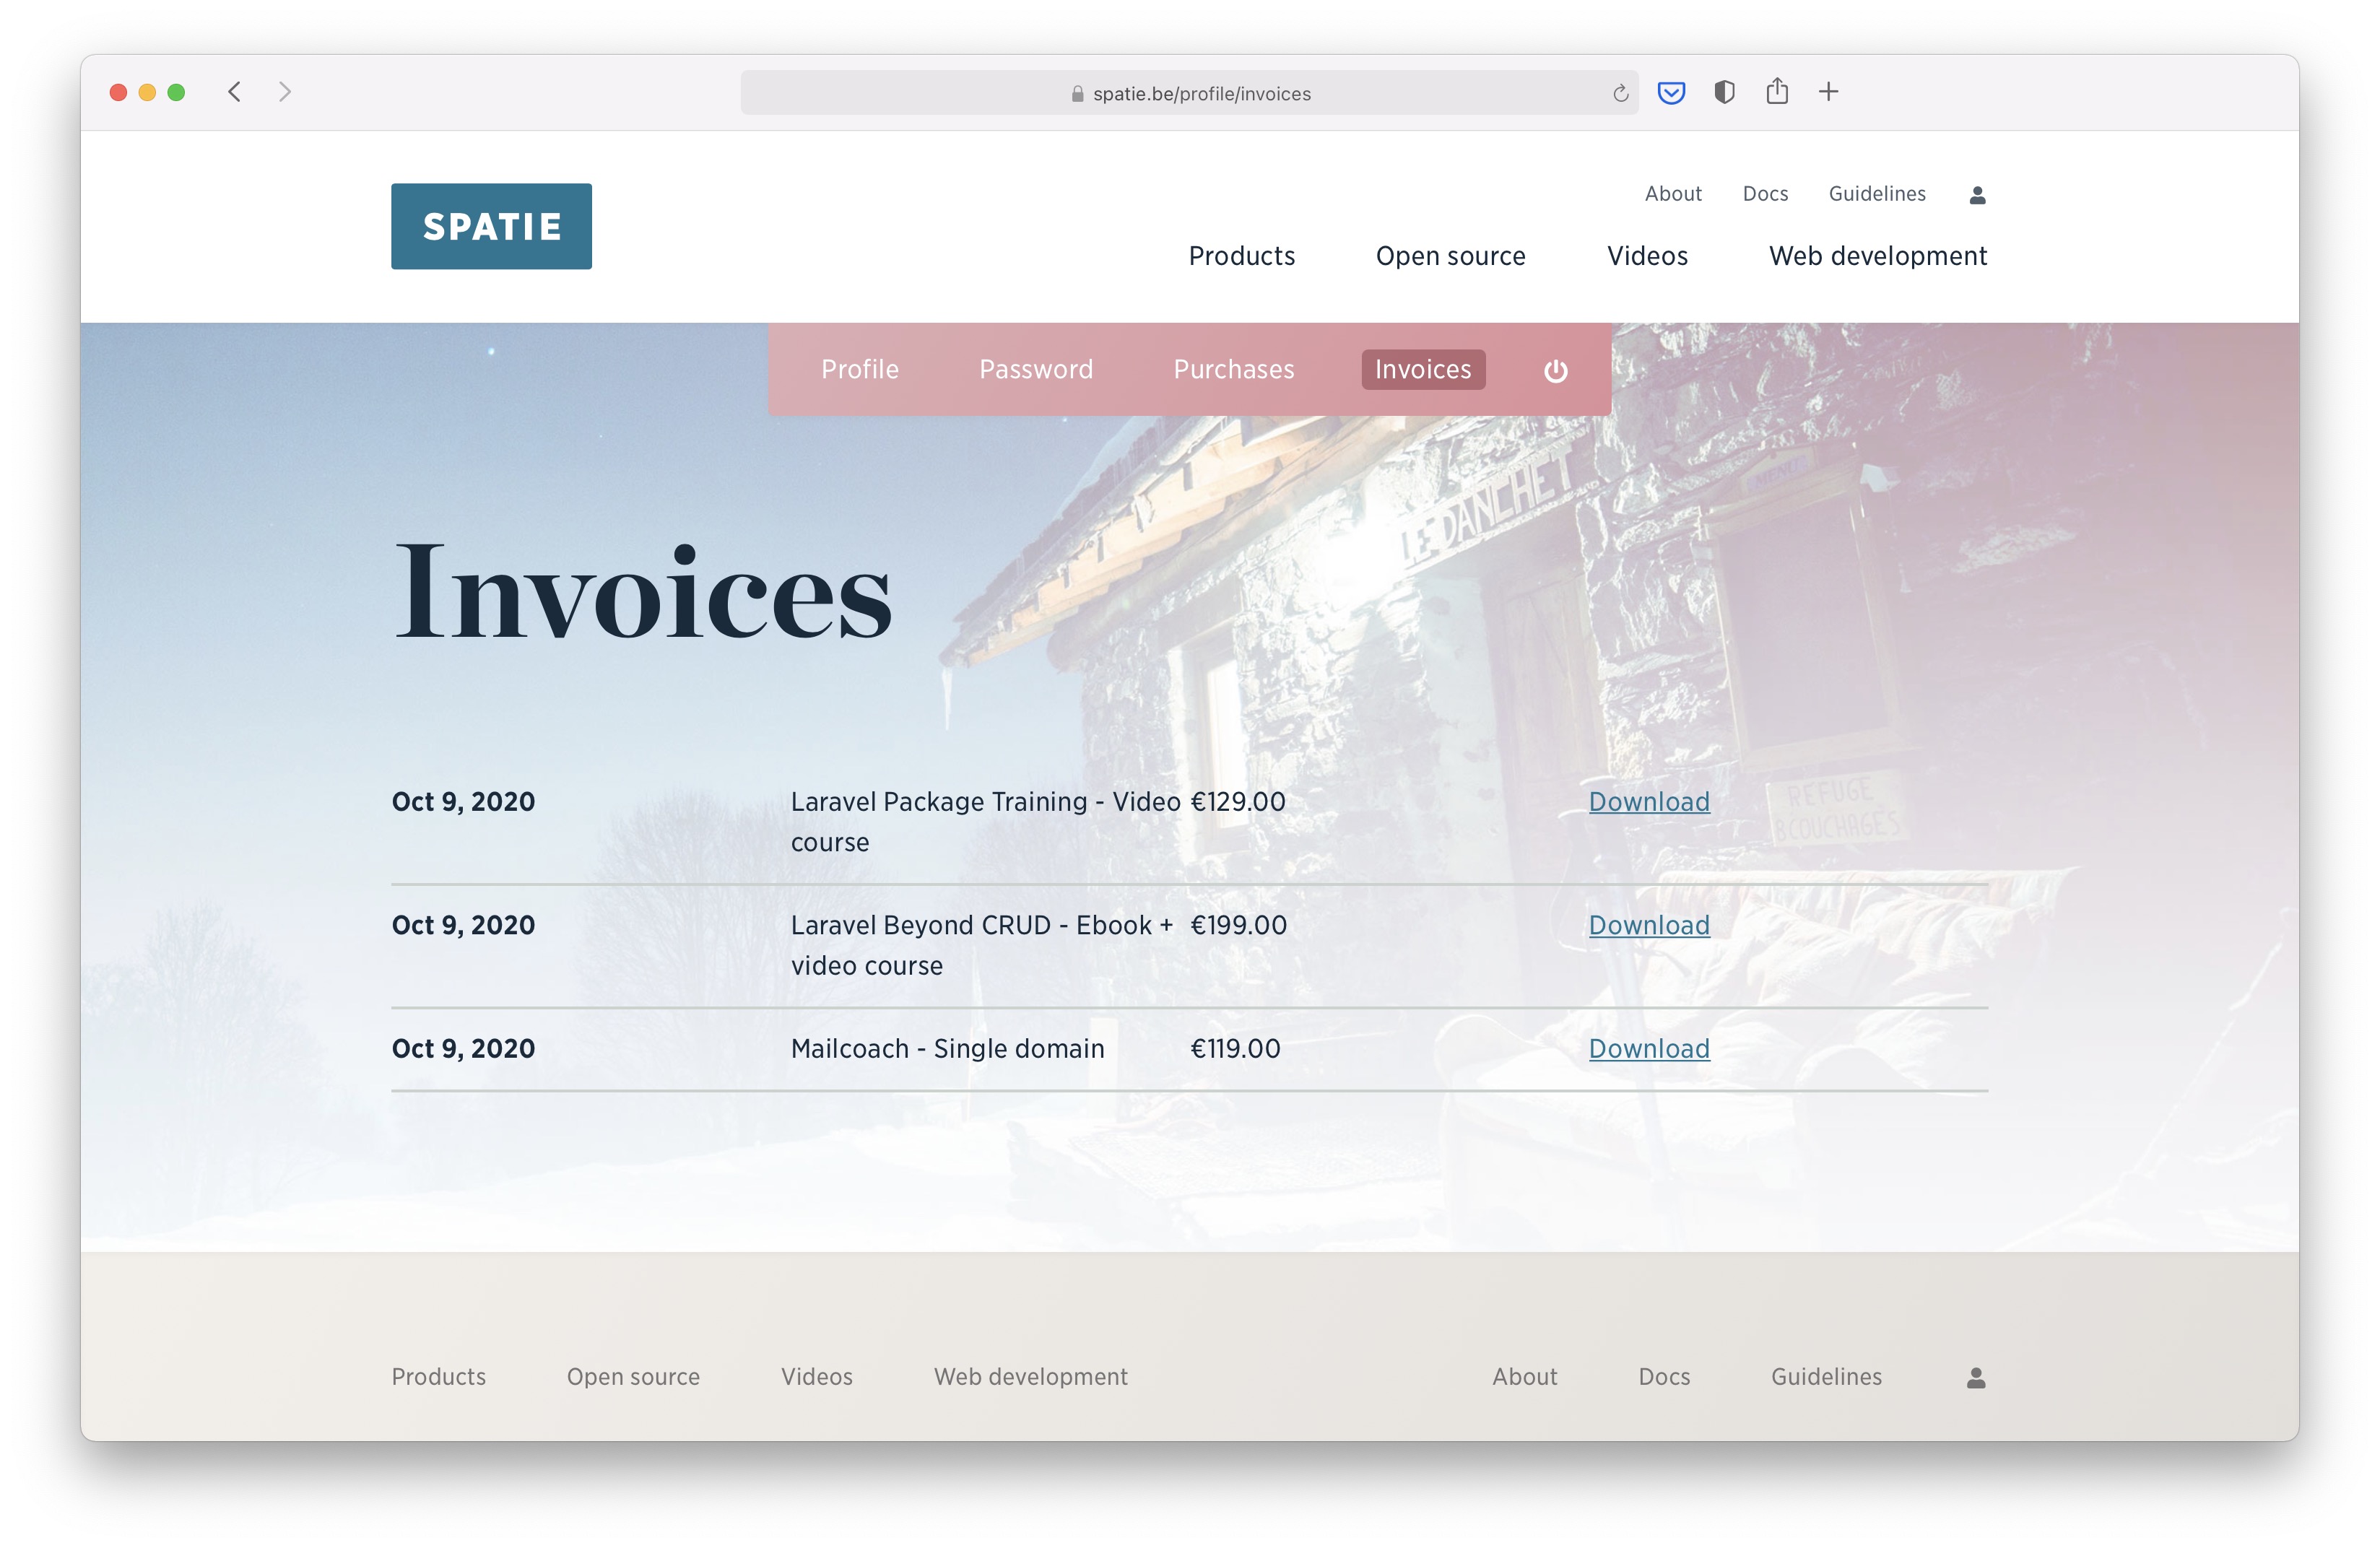
You can see that we extend CashierWebhookController, which will verify the webhook signature and store the receipt URL. That receipt URL is used in the invoices section.
The ProcessPaymentSucceededJob and underlying HandlePurchaseAction will create a Purchase model, so we can locally track the purchases of a user.
For products that have a time-limited license, a License model will be created. If a user bought a purchasable that concerns a renewal, an existing license will be extended. You can see that logic in this action.
Granted, using sleep in the AfterPaddleSaleController controller and hoping that a webhook arrives in time is a bit finicky. On the other hand, this approach didn't result in any problems yet.
I consider the sleep/webhook approach as technical debt that we need to pay in the future. It is probably better to let the Paddle JS send a checkout id to the controller. Inside that controller, using the Paddle API, we could check if the given checkout has a valid sale. When we make that change, I'll update this blog post.
This series is continued in part 5: Using Satis to install private packages.